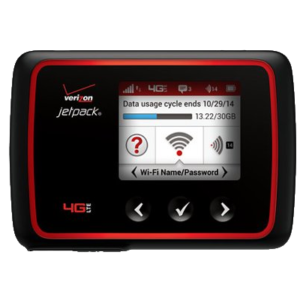
Released in October 2014, the Novatel Jetpack MiFi 6620L was Verizon's flagship mobile hotspot for almost a year and is no longer sold directly from the carrier. It was replaced as Verizon's flagship by the AC791L in September 2015.
Specifications
- Model Number: Novatel (Inseego) 6620L
- # of Connected Devices: 15 Wi-Fi / Supports USB Tethering
- Control Panel and Default Password:
Control Panel: http://192.168.1.1 or http://my.jetpack/
Default Password: Find on the LCD by selecting "Help" and then "Jetpack Admin Website". - USB Tethering Support:
WiFiRanger Tethering: Tested & works
Pepwave Tethering: Tested & works
MoFi Tethering: Tested & works - Networks supported:
Verizon LTE Bands: 2, 4, 13
4G/3G: HSPA+ 850/900/1900/2100MHz - Global roaming supported.
3G: Verizon CDMA EVDO Supported (800/1900MHz)
2G: GSM EDGE - Quad-band global roaming. - LTE-Advanced Carrier Aggregation: Yes (2x 10MHz channels)
- MIMO Support: 2X2
- LTE Performance Category: Category 4
(Max Theoretical Speed: 150Mbps Down / 50Mbps Up) - Cellular Antenna Ports: Single unofficial "test port" - TS9 connector.
- Other Ports: Micro-USB and USB-A
- Wi-Fi Technology / Frequencies: 802.11 b/g/n/a - 2.4GHz or 5GHz
- Battery:
- Dimensions: 3.7" x 2.6" x 0.76" / 4.74 oz
- SIM Card Type: 4FF / Nano SIM
- Retail Price: $199
Review & Testing Status
We have had a 6620L in regular use since it was first released, and we have extensive experience with it. Our in-depth hands-on review (originally published January 2015) is included below.
In addition, we tested this device in later test rounds:
The Review in a Nutshell:
This was a great all-around hotspot for its day, and it has proven itself over time, but we now consider it obsolete.
Read on for the details, and for some tips on how to get the most out of a 6620L.
This section lovingly provided by Sean Welsh to RVMobileInternet.com readers, February 5, 2016. All copyright belongs and retains to Sean.
Follow his travel adventures at: http://ourodyssey.blogspot.com
Changing or Removing a Stuck SIM
The SIM card in the 6620L is one of the more difficult ones to change out. Here's a quick video how-to:
Even the stock SIM sometimes stubbornly refuses to eject fully on the first try. Worse, the SIM slot is almost completely enclosed, with only a sliver of the SIM protruding beyond the case plastic, defying much conventional wisdom on SIM removal, such as pushing it out from the bottom of the slot, which is completely inaccessible on this model. To top it off, the card must clear a second piece of plastic and essentially “climb” a shallow ramp on its way out.

If, like me, you are using a nano-SIM that has been cut or punched out of a larger SIM card, you need to know right away that the nano-SIM format is quite a bit thinner than the larger formats (in addition to the more noticeable differences in the other two dimensions), and if you try to insert a cut-down SIM without addressing the thickness issue, it will get stuck. Sure, you'll be able to get it inserted, with just a tad more pressure than normal, but when you try to eject it, it will not budge.
I knew about the thickness issue in advance, and I had lightly sanded the top (non-contact) side of my cut-down card before inserting it, but I was not nearly aggressive enough, and my card would not eject when I tried to remove it. I had measured carefully before I inserted the card, but without a micrometer, it's really hard to even detect the difference in thickness between the stock nano card and a cut-down micro card.
I tried prying the card out of the slot with several different sharp tools in my kit, but all I succeeded in doing was to make large gouges on the plastic card, without so much as a millimeter of movement. After several attempts, I started becoming concerned about irreparably damaging the SIM card, and I decided I would need to open up the 6620L to get the stuck card dislodged.
If you've found yourself in the same predicament, here's how to open up the device and get your card out.
Before we go any further, though, a couple of disclaimers:
- If your Jetpack® is under any kind of warranty, whether from Verizon or from Novatel, this procedure will surely void it. Will they be able to tell? I don't know; maybe. I did not find any “tattle tale” paint or other security mechanisms, but that doesn't mean they don't exist.
- As with any type of repair, there are risks. You might break the case, the antenna, or even the circuit board. It's possible your device will be damaged and/or “bricked,” perhaps beyond repair. Proceed at your own risk; this author can not accept responsibility for any damage you may do to your device by following the procedure herein.
Tools Needed
Gather the materials you need. I recommend you work on a soft, clean work surface and have a small container nearby to hold parts as you work.
You will need a size T6 Torx screwdriver. The screw heads are recessed into the case by perhaps 8mm or so, so you will need a driver which is thin enough to reach at least that far. Most Torx “bits” made for 1/4” drive multi-tools or drills will not be long enough. I used a “key” style driver found in this set:
You will also need something to pry the case open. I used, carefully, a couple of miniature screwdrivers, but if you are new at this, you probably should use plastic tools. Heavy guitar picks work well and are inexpensive at any store that caters to guitarists. Or you could order one of the myriad “case opening tool” kits sold on Amazon, such as this one:
Once you have the SIM out, if you want to keep using it in the 6620L, you'll want to make it thinner by sanding it down. Many of the SIM punches come with a piece of sandpaper, but pretty much anything in the ~250-grit range should work. Note that many sandpapers in this range contain aluminum, so you'll want to be sure to clean the sanding dust off the SIM thoroughly before inserting it.
Procedure
- Remove the charging cord, the battery cover, and the battery and set them aside.
- Open the rubber door over the SIM slot and ensure that the SIM is fully inserted into its slot as far as it will go. (If the SIM is partially ejected it will interfere with the opening of the case.)
- Using your T6 Torx driver, remove the four case screws and set them aside (Figure 1). Caution: they are small, easy to drop, and very hard to see if you do (Figure 2).


- Now comes the hardest part:

Figure 3: Case halves separated. Note the tabs that latch the halves together. Insert an edge of your pry tool between the case halves in any of the four corners (you will not be able to insert it mid-side, only in the corners), Work your way from the corner toward the center of one side slowly and carefully; you will hear pops as the press-fit “latches” snap open (Figure 3). Be careful to keep the tip of the tool within a quarter inch or so of the case edge; inserting it further risks damaging the innards.
- Repeat for each corner/edge combination until the two halves of the case are separated. Do not try to pull the halves apart prematurely; you'll break the case or the display window. Move the pry tool slowly along each edge.
- Once the case halves are separated, the back of the case (the part that holds the battery) will come off the circuit board, which will remain attached to the front of the case (the part with the display window and buttons).
- Before touching any part of the circuit board, discharge any static charge you may have on your hands by touching a nearby grounded object.
-

Figure 4: 6620 internals showing SIM slot, spring antenna contacts, and test port. Observe that there are several spring-loaded pressure contacts that connect antennas in the back part of the case to the circuit board when the case is assembled. Be careful not to damage these contacts and that no foreign matter gets between them when reassembling the case (Figure 4).
- Once you have the unit opened to this extent, you should be able to eject the SIM at least part way, and then remove it using tweezers, fingernails, needle-nose, etc.
-

Figure 5: My SIM after "punching," still within the larger outer portion. I obscured the numbers but they were intact. You'll want to sand down your SIM and test-fit it before reassembling the case. I found I had to do six or seven sand/clean/test passes before the card would eject cleanly and smoothly. Figure 5 shows what my SIM looked like before I started, just after “punching” it out (I left it in the “frame” from which it was punched for this photo; I put it back in this same frame when I need to reinstall it in my smartphone.
- Now, without the case in the way, is the time to fine-tune your card fit (Figure 6).
-

Figure 6: Test-fitting the SIM. It should eject smoothly and easily. In my case, I needed to sand so aggressively that I was starting to see the outline of the actual chip embedded in the plastic (Figure 7). I found the easiest way to sand the card down smoothly and evenly was to lay the sandpaper face up on a hard, flat surface, and firmly press the SIM card, contact side up, down onto the sandpaper with my index finger, moving the card around in a figure-8 pattern.
- Remove the SIM before reassembling the case.
- Blow any sanding dust or other residue out of the SIM holder and off the circuit board. You can use compressed air, or a canned duster product, or even your breath, like blowing out a candle.
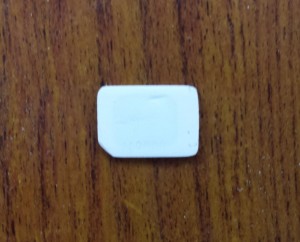
Figure 7: My SIM after completing sanding. The numbers are gone entirely and you can begin to make out the outline of the actual chip through the plastic. If you use your breath, let it sit for five minutes afterwards to let the moisture dry.
- Carefully position the case back over the case front and circuit board, making certain the pressure contacts, screw holes, battery contacts, and case edges are all properly aligned. You might have to adjust the small rubber seal over the “test port” as well. Check that the rubber SIM cover is in its proper place – this item can come loose during disassembly. If the cover annoys you, now is a good time to remove it entirely – it is held in place with a tab that is easily slid out while the case is open.
- Once you are certain the case halves are well aligned, begin snapping the case back together, working your way around the edges using only thumb and finger pressure. You'll hear the detents snap into position; when you are done there should be no visible gaps along any edge.
- Replace the four T6 Torx screws. These are self-tapping screws, but you'll want to try to start them back in the grooves made by their original installation. Rotating each screw counter-clockwise until you feel it drop into place before starting it clockwise will often do the trick.
- I don't have a torque specification for these screws. If you use the key-style driver as I did, “finger tight” with the thumb and index finger turning the short end of the driver is sufficient. Remember you are turning a metal screw into a plastic case, with a driver that can apply way more torque than it takes to strip the plastic.
- Insert your SIM card, and replace the battery and battery cover.
- Power up and test the device.
That's it -- you're done. Enjoy being able to remove your SIM at any time smoothly and easily.
The rest of our in-depth review in the member section includes these topics:
- Video Overview & Tutorial
- MiFi 6620L - Key Features
- SIM Compatibility
- Tutorial on Swapping the 6620L SIM
- MiFi 6620L Bugs, Glitches, and Annoyances
- Performance Results
- MiFi 6620L Alternatives
- Concluding Thoughts
Alternatives to Consider
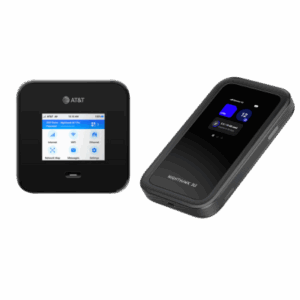
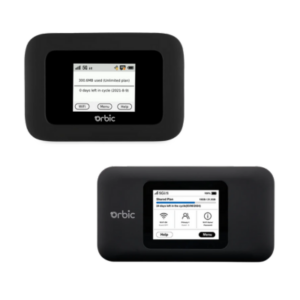
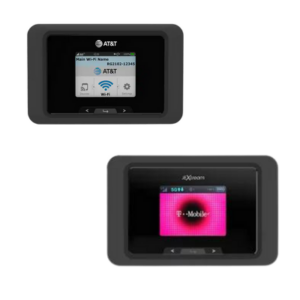
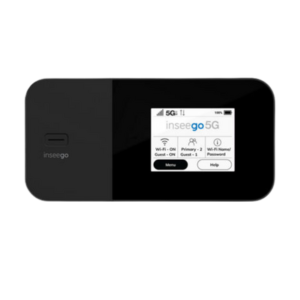
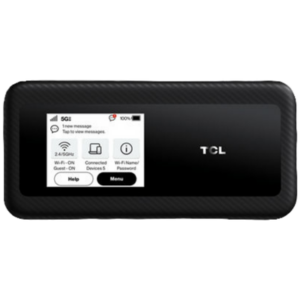
For other popular mobile hotspots on the market - here are our featured options:
This Review Contains Additional Member Exclusive Content!
We are Honored to be Member Funded! No ads, no sponsors, no selling (but may contain affiliate links)
Our members fund our in-depth independent reviews.
This entry may contain additional member exclusive content such as testing notes, field testing data, user interface tours, comparisons to alternatives, analysis, tips, videos and discounts.
Members also get interactive guidance, alerts, classroom and more.
Other Ways to Support Our Work At MIRC
Purchasing Options
- Amazon
- Verizon Direct (No longer Available)
- Ebay
Be careful when shopping on eBay and make sure that you're buying JUST the mobile hotspot, and not also a rental Verizon data plan.
Battery Replacement Purchase:
Mobile hotspot devices are small, self-contained units that receive a cellular data signal and transform it into an internet connection. They are a cellular modem and router combined. Most can create their own personal Wi-Fi network.
They are typically designed with a specific cellular carrier in mind and require a suitable cellular data plan of their own to operate. You might see them called Jetpacks (Verizon's term for them) or MiFi (Inseego's name for them).
Here's a quick video going over the features of a hotspot, and what makes one better than another:
The guides below have been hand-picked to help further your education about selecting mobile hotspots and best utilizing them in your mobile internet setup.





 Mobile Internet Resource Center (dba Two Steps Beyond LLC) is founded by Chris & Cherie of